Not every document is equally sensitive. A brochure may go out into the world, a client file may not. Without classification every employee has to make that distinction themselves, every time. With classification you capture it once in labels: what a label allows applies automatically to every file carrying it, and everything without a label falls under the default label. In this guide you enable classification, create your own label for client files and enforce the rights on sharing, download and email. Note: the Governance Center is currently shown in Dutch; the captions below translate every step.
Step by stepSeven steps
1. Open the Data classification tab 2. Enable classification 3. Add your own label 4. Set the label's rights 5. Save the label 6. Choose the default label 7. Enforce the rights
Open the Data classification tab
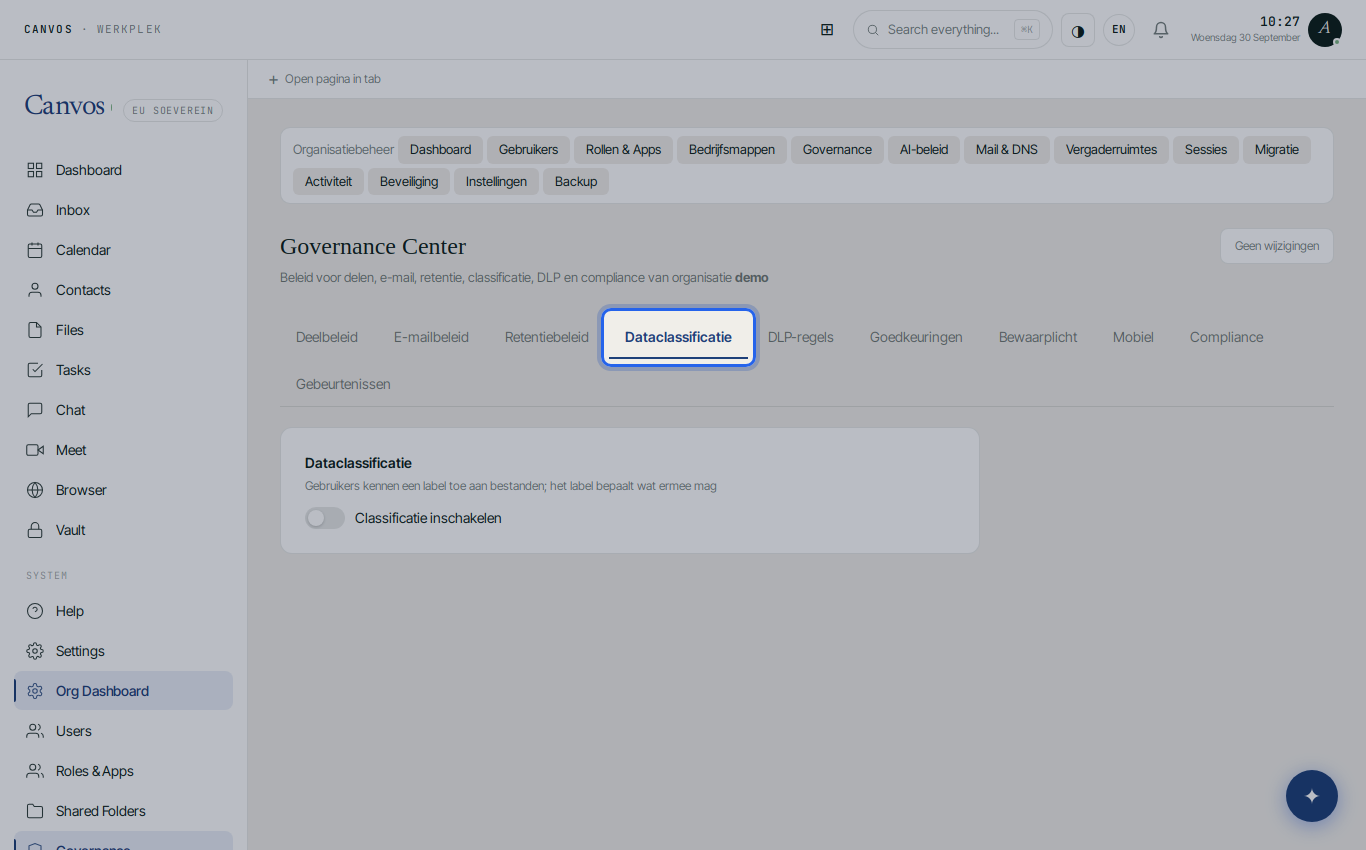
Log in as an administrator, click Governance in the sidebar and choose the Dataclassificatie (data classification) tab.
Enable classification
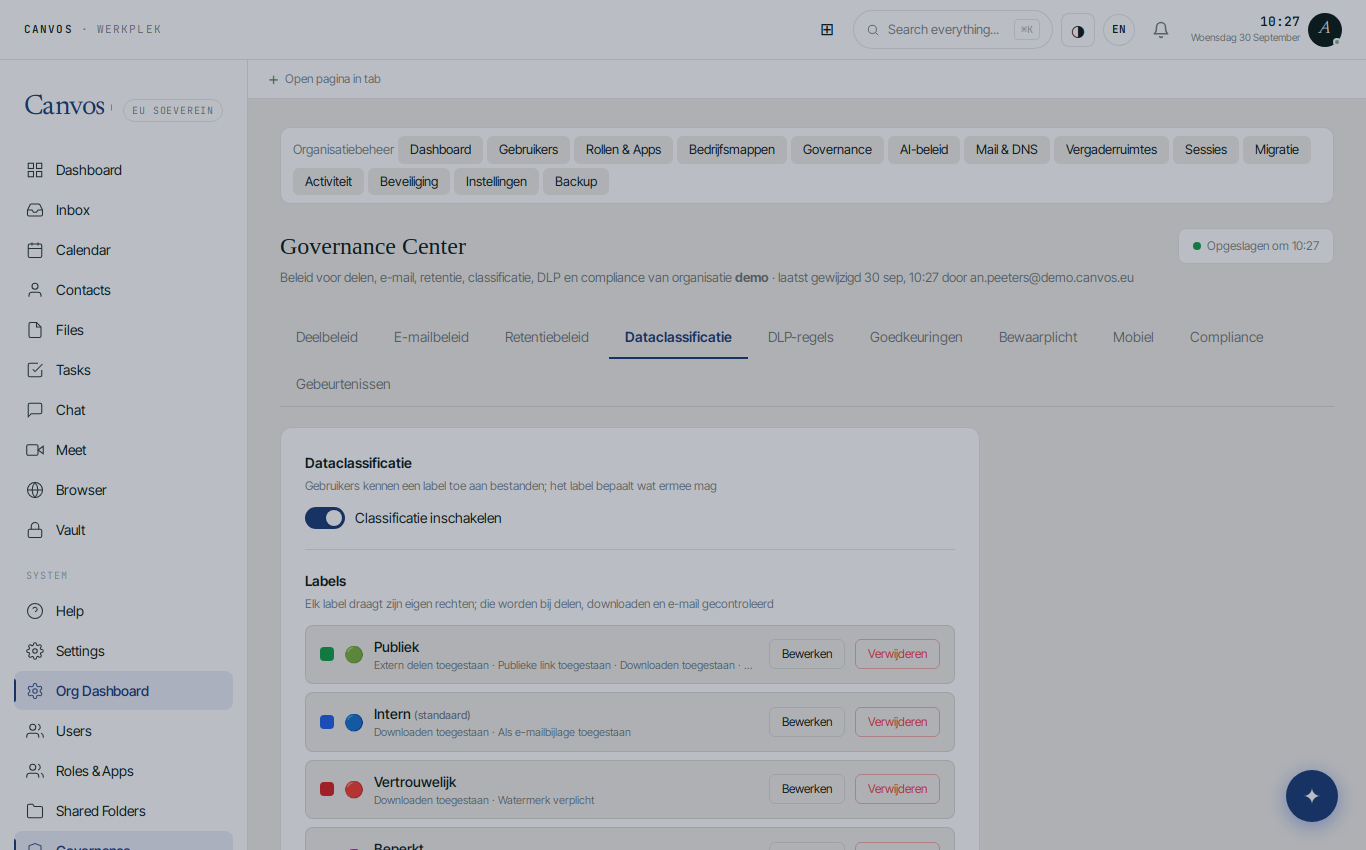
Switch on Classificatie inschakelen (enable classification). Canvos immediately shows four built-in labels, each with its own rights: 🟢 Publiek (public) allows everything, 🔵 Intern (internal) may be downloaded and emailed but not shared externally, 🔴 Vertrouwelijk (confidential) may be downloaded with a mandatory watermark, 🟣 Beperkt (restricted) may only be viewed, with a watermark.
Add your own label
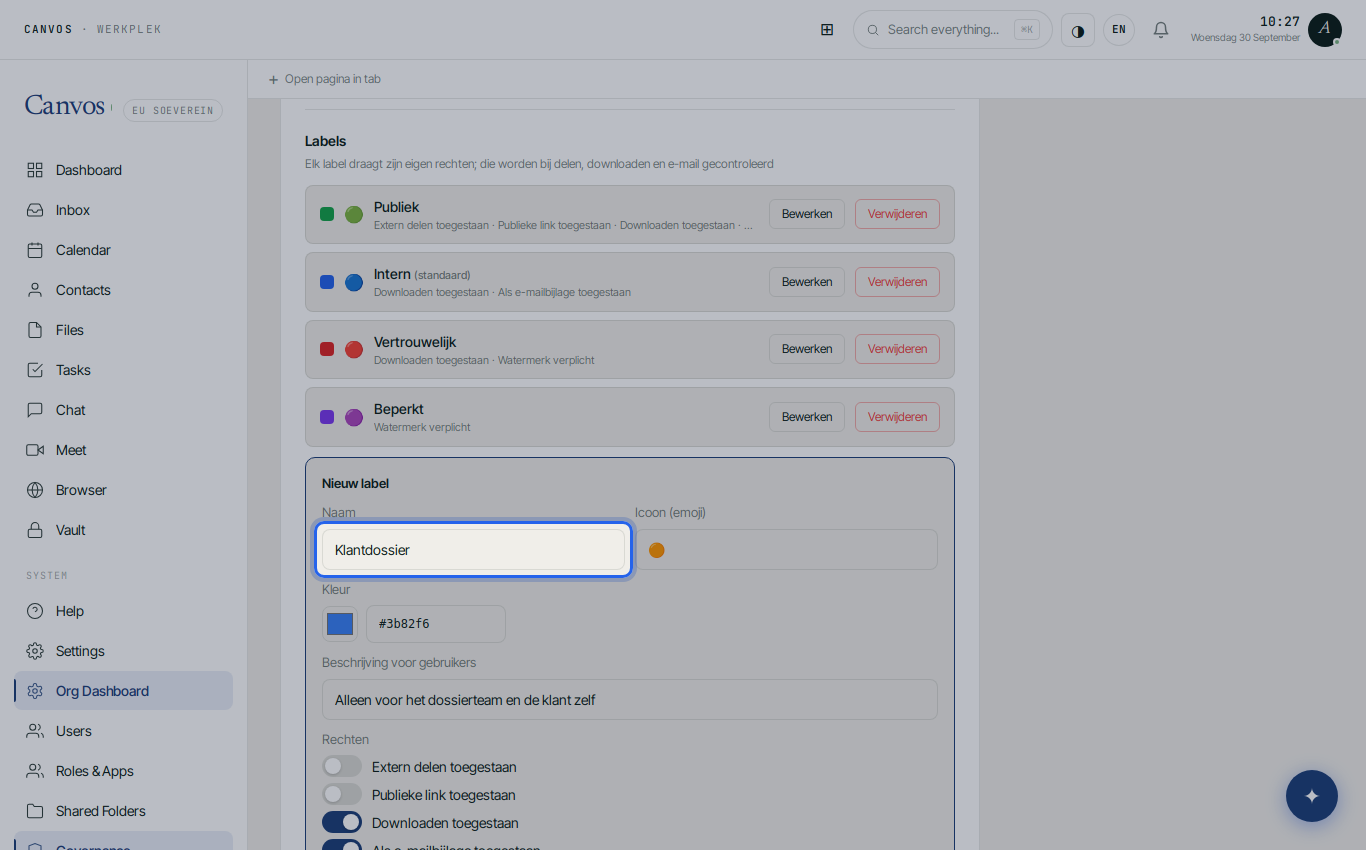
Click + Label toevoegen (add label). Give it a name your people recognise, for example Klantdossier (client file), pick an icon such as 🟠, and write a short description users will see: Alleen voor het dossierteam en de klant zelf (only for the file team and the client).
Set the label's rights
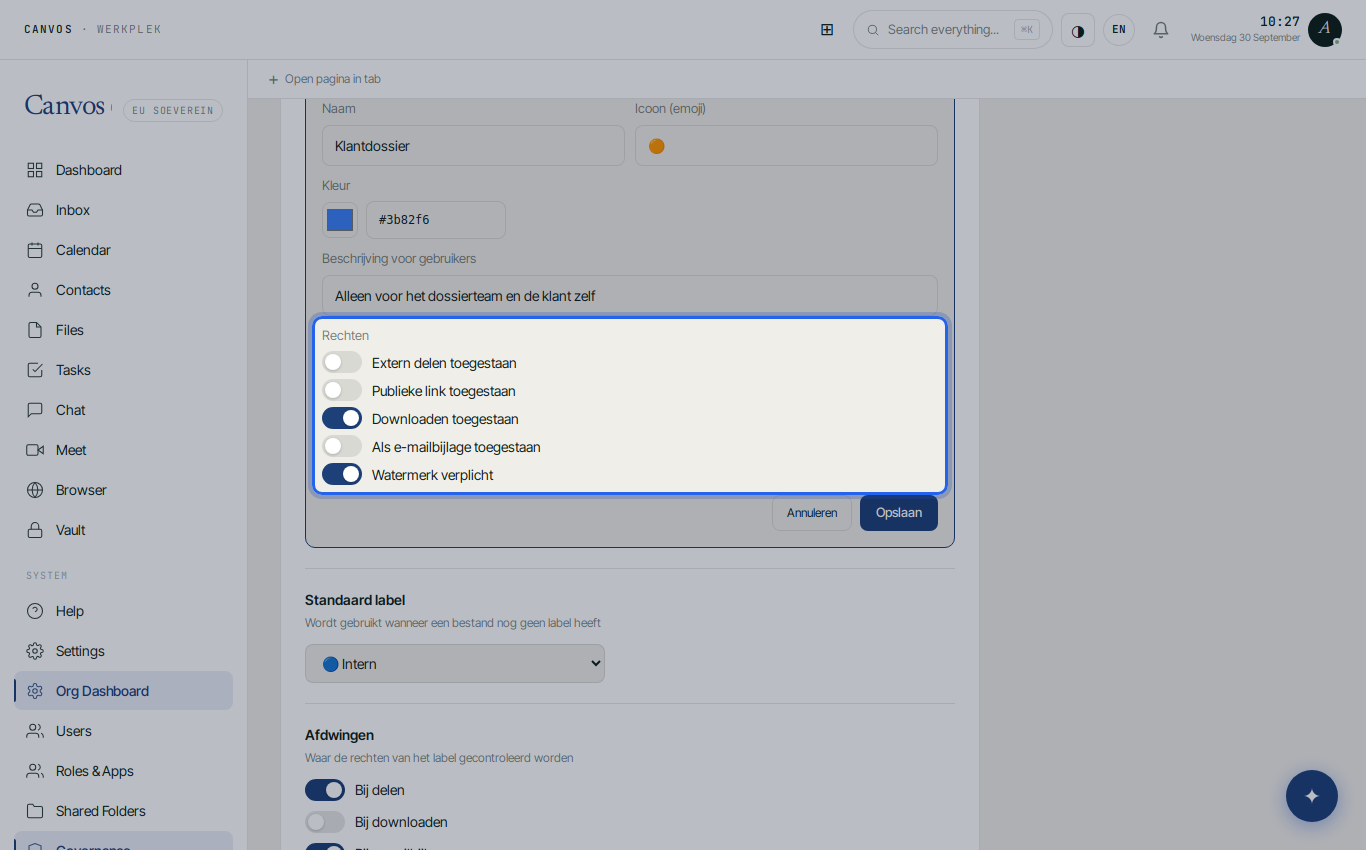
Under Rechten (rights) you choose what a file with this label may do: switch off Extern delen toegestaan (external sharing) and Publieke link toegestaan (public link), leave Downloaden toegestaan (download) on, switch off Als e-mailbijlage toegestaan (email attachment) and switch on Watermerk verplicht (watermark required). A client file thus stays inside the organisation, can be edited locally, and every download carries the name of whoever made it.
Save the label
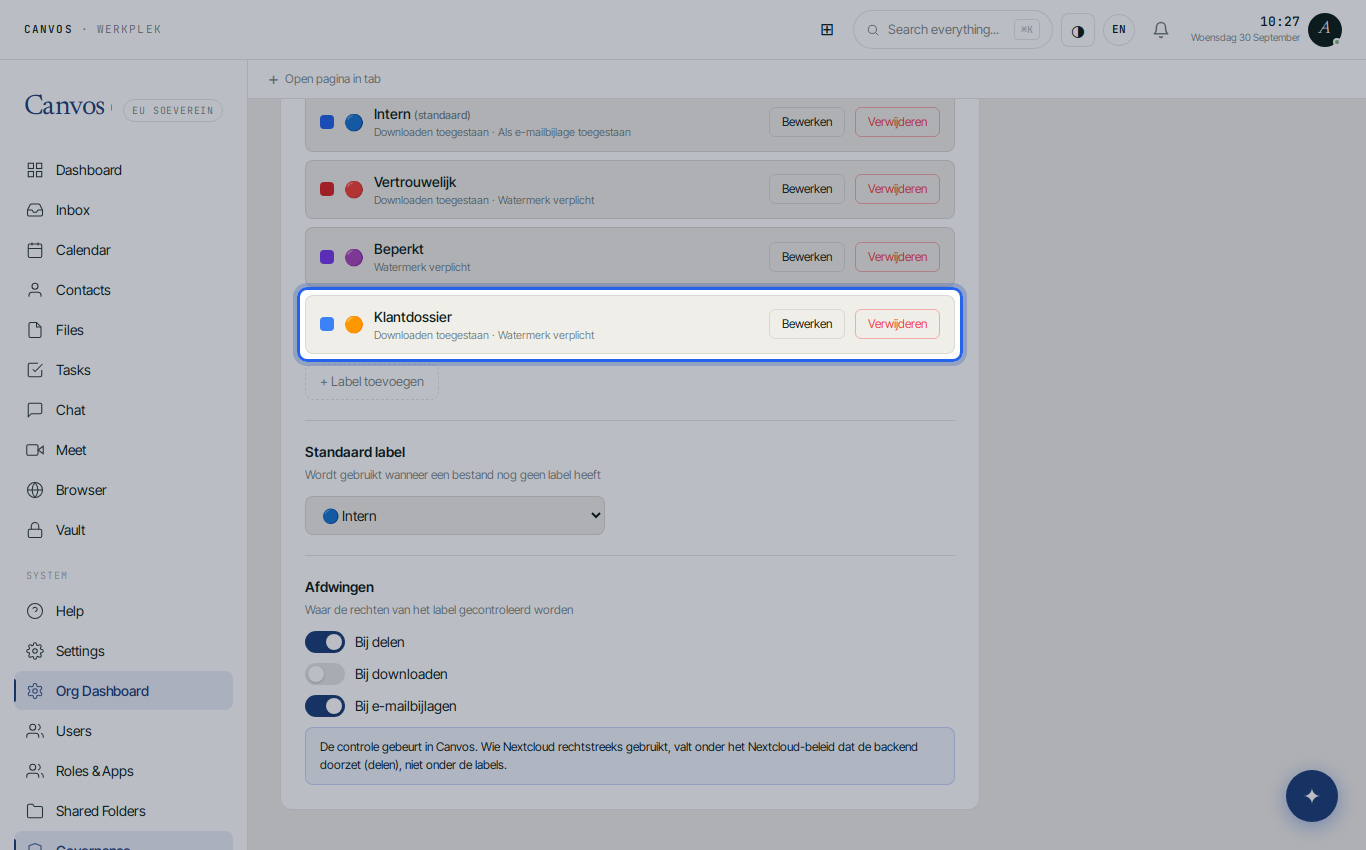
Click Opslaan (save). The label 🟠 Klantdossier now sits among the other labels with its rights summarised in one line. Bewerken (edit) changes it later; Verwijderen (delete) removes it, after which files carrying it fall under the default label.
Choose the default label
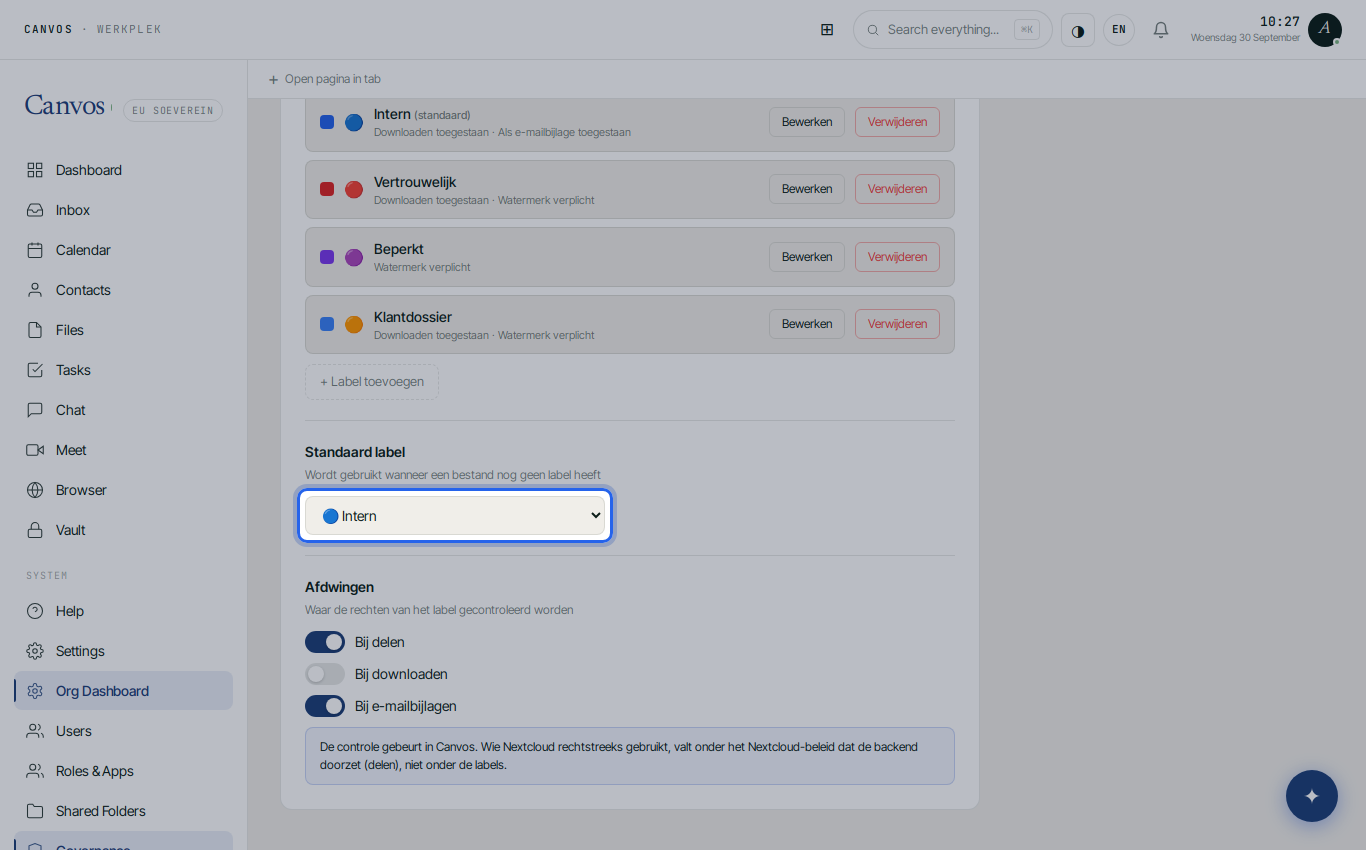
Under Standaard label (default label) choose 🔵 Intern. Every file that has no label yet is treated as Internal: usable within the organisation, not outside. So there is never a file without rules.
Enforce the rights
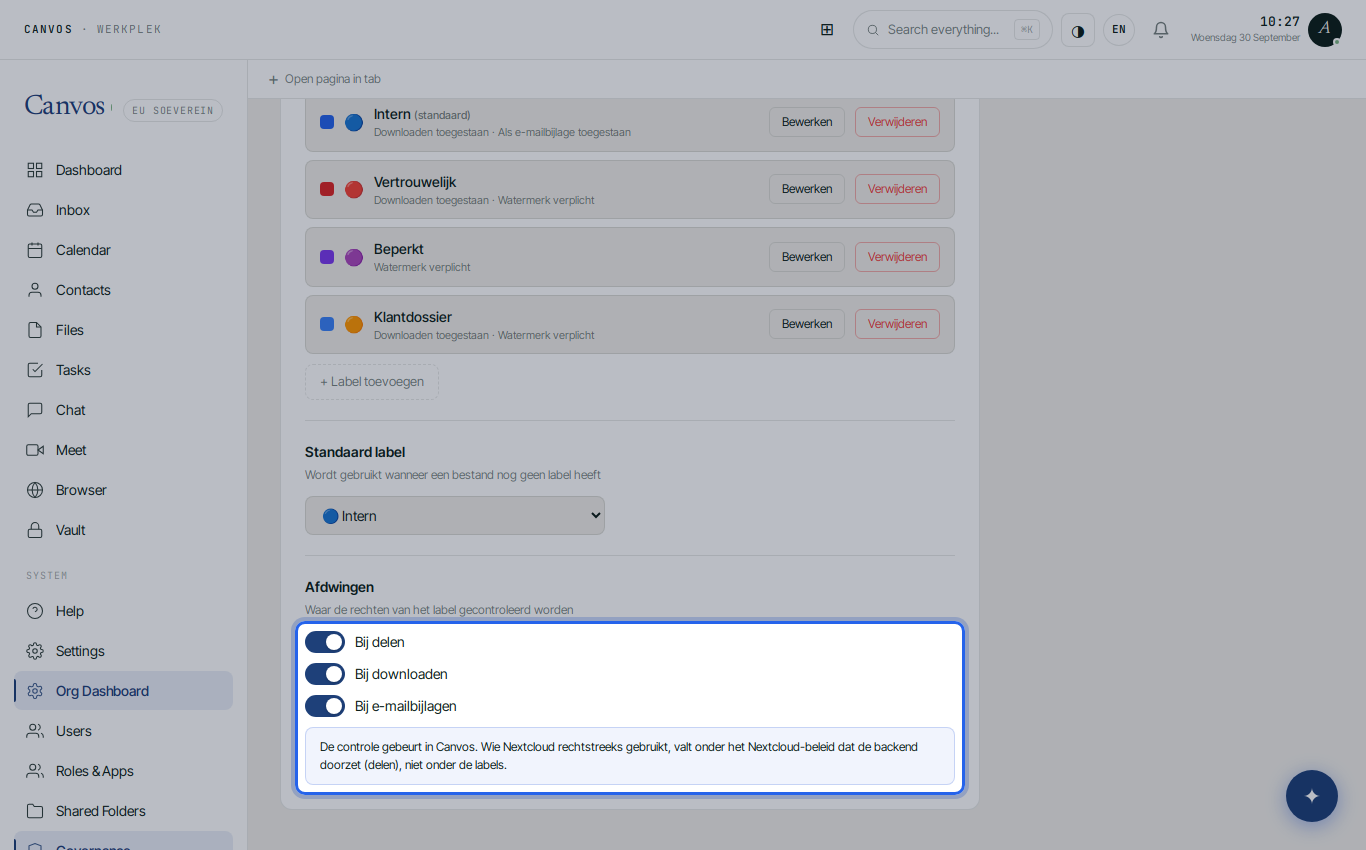
Under Afdwingen (enforce) switch on Bij delen (on sharing), Bij downloaden (on download) and Bij e-mailbijlagen (on email attachments). From now on Canvos checks the file's label at those three moments. Top right you see Opgeslagen om (saved at): the policy is stored and active.
FAQFrequently asked questions
How does a file get a label?
Files without a label fall under the default label you chose in step 6. Per-file labels are set through the Canvos classification API; a label picker in the Files module itself is planned. Until then the default label is the rule that applies everywhere.
What happens if someone still tries to share a Confidential file?
With On sharing enabled Canvos checks the label. If the label does not allow external sharing or a public link, the share is blocked and logged, with the reason.
Can I change or delete the built-in labels?
Yes. Every label has an Edit and a Delete button. If you delete a label, files that carried it fall under the default label.
Does the watermark also work without the sharing policy?
A label's watermark applies on download and in the document viewer for files with that label. The watermark from the Sharing policy applies to all downloads. You can combine both.